 Home
HomeAll Hacks
Zetec Engine
SPI Engine
General
Suspension
Interior
Exterior
In-Car-Entertainment
Detailing and Cleaning
Maintenance
Miscellaneous
Replacing the thermostat and/or thermostat housing
The thermostat housing (also called the water outlet) has a nasty habit of cracking internally and letting water flow past the gasket. The thermostat is also a commonly replaced part. Here's how to replace them.
Time Required:
45 to 60 minutes
Tools Needed:
Procedure:
1) Let engine cool down for at least 1 hour before beginning.
2) Follow the instructions in this article to drain the cooling system
3) Un-plug the coilpack wiring harness. The retaining clip is on the bottom of the plug. Press it upwards while pulling the plug toward you. (see diagram below)
4) Unbolt the EGR tube brackets with a 13mm socket and a 10mm open-end wrench (see diagram below)
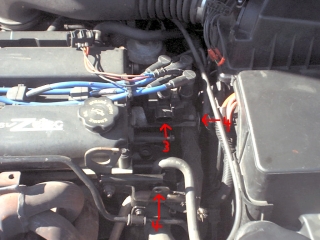
5) Push the EGR tube down a little bit to give you working room to access the bolts on the thermostat housing
6) Using pliers, squeeze the clip on the upper hose, and slide it away from the end of the hose. Release pressure on the clip, then pull the hose straight away from the thermostat housing to remove it. (see diagram below)
7) Using the ratchet and a 10mm deep well socket, remove the 3 bolts holding the thermostat housing to the cylinder head. Use a finger ratchet if needed. (see diagram below)
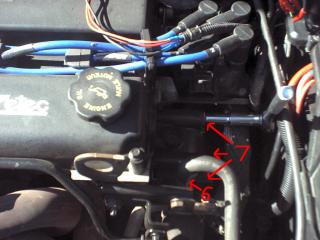
8) Using pliers, squeeze the clip on the rear hose, and slide it away from the end of the hose. Remove this hose the same way you removed the hose in step 6.
9) Once the rear hose is removed, you can push the thermostat housing -- still attached to two more hoses -- down and under the hard, black A/C tube. This will help you remove the remaining two hoses on the front of the thermostat housing. Again, remove these hoses the way you did in steps 6 and 8. The housing will be completely removed at this point.
You can see the damaged housing in the picture below. This is very common:
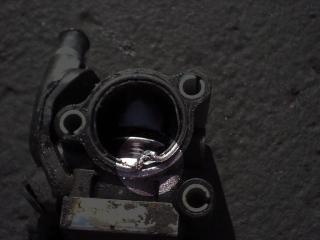
10) Using a TORX T25 driver, remove three the screws attaching the thermostat retainer.
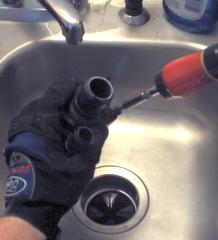
11) Pull the thermostat out of the housing.
* During re-assembly, you will need to re-use the old thermostat and thermostat retainer. The new housing does not come with these parts.
Assemble in reverse, and Follow the instructions in this article to re-fill the cooling system
comments powered by Disqus